I knew I wanted it to be quite rustic and on my last trip to see Ed my hardware guy (see previous post), I picked up some great hinges for this project.
I measured, drew out and cut the pieces of barnboard. Then I started planning on how I was going to join the pieces to not only be strong and durable but to look great. My preferred method is wood glue and screws (when you clamp the pieces together with the glue and then screw them together, the result is a very strong joint that is tidy as well). The only problem then becomes how to hide the screw heads.
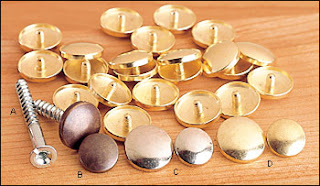
There are several different ways of doing this. If you are going to be painting a piece, you can putty the holes, sand and paint and they will disappear. But since I was leaving the barnboard exposed I needed a more inventive method. I could have used wood plugs, or wood buttons.
I found these online at Lee Valley. But they were both too costly and too "sparkly" new for my liking.
I wanted something a bit more unique and rustic. Again I contacted Ed and discussed it with him. Once again he assured me if I came up he could help me find a solution. We looked at several different ways of covering them and the method I liked best was to plug the holes with wood buttons first, then hammer a metal tack ontop of that.
I had to countersink the screw (basically set it deep into the wood) and then drill a hole big enough for the wood button and glue it into the hole. Then I hammered the metal tack into that forming a strong and decorative cover for the screw hole.
It took a bit longer than a simpler method, but I like the way it looks and is in keeping with the rustic feel of the mailbox.
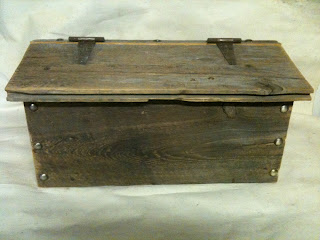
Here is the finished product...What do you think?


