Tuesday, March 20, 2012

Chairs catch up to the table

If you have been following my posts, then you know I spent quite a while on the banquette area in our kitchen.  Having found an old church pew and then finding the perfect table for the space and then redoing them how I wanted the area should have been complete...right?


But like any renovation or restoration or makeover project once you change something and get it just how you like it everything else doesn't look so great.  So when the table and pew were finally done and absolutely perfect....it seemed the chairs were the ugly things in the room.  They hadn't looked so bad until I redid the area, but afterwards they looked tired and in need of change.  And who am I to deny a change?  One of the best and most inexpensive ways to make a big change is by using fabric.

So...I looked in my stash of fabric finds....these are the yards I see at the fabric store that are on clearance and I love too much to pass up....and I found one that I have been waiting to use.
 It is a gorgeous pattern (I think) and the brown design is actually a raised velvet finish so it has great texture.

Because this area will be well used and around food I knew I wanted to slipcover the Parson's Chairs.  This would make it very easy to toss into the wash if food or grubby fingers got the fabric dirty.  If you have kids, you need to get to know slipcovers!!
Before you start to make the slip covers I always pre-shrink the fabric.  This way when you do have to put the slipcovers in the washer and dryer they won't shrink so much that they don't fit.  I washed the yardage on hot and put it in the drier until the fabric was completely dry.

Next step is to lay the fabric on the piece of furniture you are going to slip cover.  In my haste to finish these chairs I didn't take any photos but I will describe how I made the covers.

Step 1:  lay the fabric on the chair with the good side down and rough side out.  These chairs were easy since I could start at one end and run the fabric up and down to the other end of the chair to cover it.

Step 2:  Figure out where your seams will be and cut away excess fabric.  You basically pin the fabric around the chair where the seam/join will be and cut away the rest.  Leave about 1" to play with.

Step 3:  Pin the fabric together with lots of pins to "make" the seam.  This pin line is where you will be sewing later on.

Step 4;  take fabric off chair and then sew on a machine along the line where the pins are.  When you get to a corner, you have to round it off to finish it.

Step 5:  Hem up the bottom of the slipcover...I left it longer than the existing fabric line in case it did shrink a bit in washing and so the old fabric wouldn't show underneath.

Step 6:  Turn right side out and slip over chair!

I also found a way to slip cover this chair without any sewing...you can see it on the link below
http://loveyourroom.blogspot.ca/2011/01/my-morning-slip-cover-chair-project.html

I prefer the machine sewed on because of the durability of it and the fact you can wash it easily...just slip it off and into the wash it goes.

Here's how they look finished.

Very subtle and elegant with the table and pew.  I am also going to do another pair of slipcovers in a brighter more vibrant fabric for spring/summer.  Another benefit of slipcovers is that you can change the look of the chair often according to season, taste and trend.
This is my inspiration for the fabric for the spring/summer look...
I will keep you posted on what I find at the fabric store.  Which I must share is Designer Fabrics on Queen West in Toronto.  If you haven't been it is a must visit place.  www.designerfabrics.ca

Happy First Day of Spring!!! Don't these orangey fabrics just have you craving sun and fun?


Monday, March 19, 2012

The Powder Room reno

We have been planning on renovating our main floor powder room lately.  It started when we knew we would be doing wood floors in the kitchen eventually and realized we wanted to put down tile in the powder room.  The 15+ year old vinyl floor had seen better days.

I don't have a before picture because the floor was just ugly...but it is the same flooring as the kitchen so you can see it here.


I knew I wanted 12"x24" tiles in porcelain, brick laid.  Which means you stagger the tiles so they lay in a brick pattern.  I went to Tile City http://www.tilecity.ca/ on a recommend from a friend who said their prices are as good as the big box stores and their service is amazing.  This is the same friend who steered me towards the amazing "faux" Restoration Hardware light....she's a good friend to have!!
Once again, her advice paid off...the owner was super helpful, friendly and the price was amazing.  Less than $150 for the tile and grout for the room.

So this is where it gets a little sticky.  They say timing is everything...and that is especially true for renovations.  It's really important to plan out all the details and figure out the order things need to get done in to make it go smoothly.

The outdated pedestal sink was also being replaced.  It was unstable, had no storage and really out of date.  Here it is on our back deck alongside our wine and beer bottles...trailer park coming soon.


I had decided to reuse the vanity from the Jonathan Adler project I did back in January but to use a different sink and paint it all white.  I love using old furniture in a bathroom because it's practical and quite frankly the old furniture is better built than most new vanities made out of MDF or particle board.
A couple coats to cover the green...a hole cut out of the top to house the drain and water pipes and install the new sink and faucet.
Here it is sitting in it's new home in the bathroom....

In our excitement to get this project started, we jumped the gun a bit and had to do things a few times over...my husband is quite handy at plumbing and was eager to begin.

Step 1:  remove fixtures and old flooring, baseboards etc
Step 2:  re route old plumbing that was in an awkward position....turn off water...solder...turn on water
Step 3:  realize that wife is having about 15 women over in 1 day and a toilet in the living room is not going to work....and that having no toilet or working sink on that floor is also problem.
Step 4:  replace fixtures in the bathroom....

I decided to go with the "reno chic" theme and left a red Sharpie so everyone could leave an autograph on the old plywood floor and be forever part of the bathroom.
Totally fun idea and all of us in the family signed it too.

Step 5:  take fixtures out after party is done to lay new 1/2" plywood on the floor....the helpful guys at Tile City recommended we put tons of screws into it to make it solid and put especially long ones into the joists below...we marked where the joists below were on the floor so we knew where to use the longer screws.

Step 6:  start to lay out tiles in the pattern you want.  It's always a good idea to dry fit them to see where you have to cut tiles etc....We wanted to be sure the threshold started with a full tile and if we had to cut any down they would be at the back and mostly hidden by the vantiy and toilet.  We marked the tiles that needed to be cut down at the back and began...and by "we" I mean my husband Fred....huge thanks to a certain awesome neighbour who lent us the wet saw...Gary, you are the best!

Step 7:  cut out holes for plumbing and dry fit tiles to make sure it all works well and all tiles fit well in room.
Step 8:  Mix up mortar according to directions...don't have a clue what those directions were...again, not my job here

Step 9:  lay tiles on mortar in predetermined pattern, use tile spacers and press down to make sure they are all level...allow to dry 24 hours

Step 10:  grout tiles...no detail here...sorry I was on coffee break during this stage...something about letting dry and repeatedly wiping off excess grout...yawn...

Step 11:  Excitedly put fixtures back in and exclaim how great everything looks

Step 12:  realize you need to remove fixtures...AGAIN....to put in baseboard

Step 13:  re-install baseboards and shoe moldings (the thingy at the bottom where floor meets baseboard)

Step 14: re-re-re-install fixtures and finally exclaim how amazing it looks once complete!!
So happy with this project.  It took a while and was frustrating to have to remove the sink and toilet again and again....at least I assume it was...but in the end the floor looks great, the vanity and sink are beautiful and more practical and the bathroom finally feels finished.

Next post will be about the chair makeover for the banquette area...I had to do something while the toilet was being installed and re-installed!!

Monday, March 5, 2012

Annie, the love is lost....

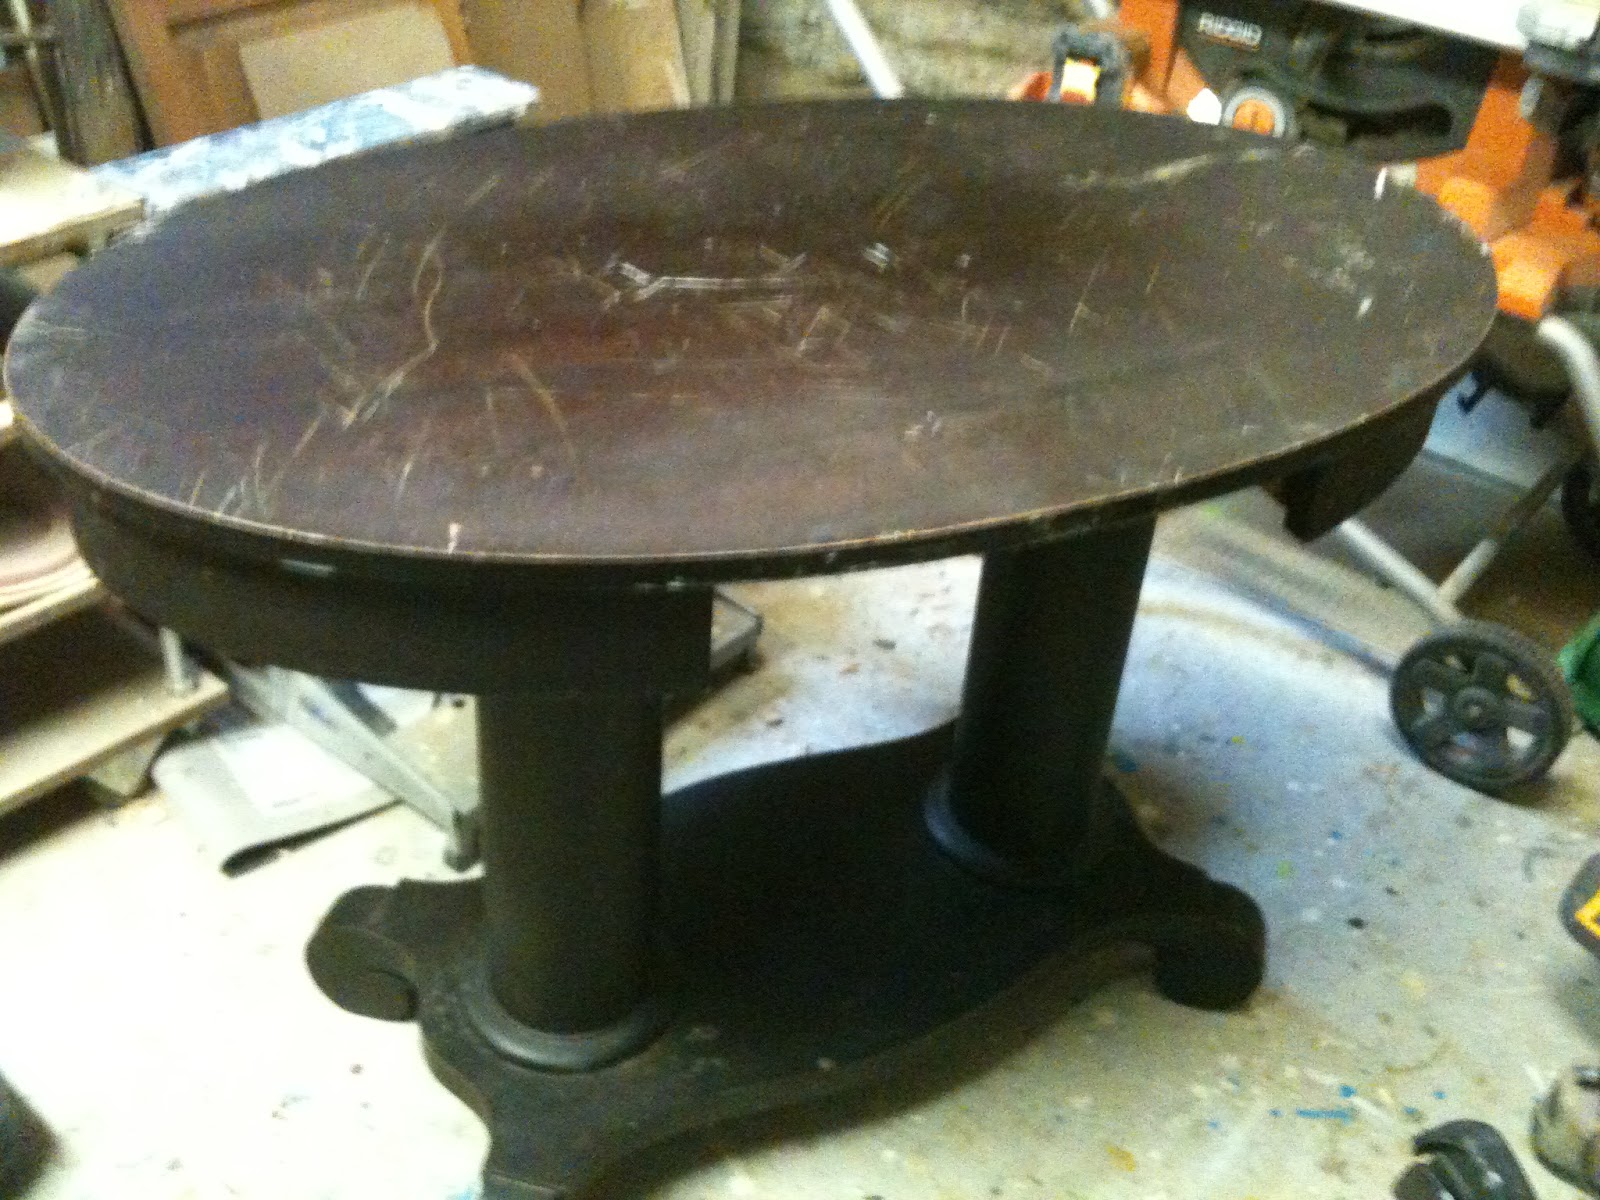
Finally at long last I finished the oval table I bought and refinished for our banquette area.  It's been a long haul and I have to say I am glad it's over and finished....and I really love the way it turned out.  But before I show the pics, lets review the process....

Step 1...find perfect table


Step 2...take apart table, cut down legs, sand off old stain


Step 3....finish with Tung Oil and reassemble
Step 4....realize it looks awful and you have to start again....

Step 5...sand again and finish using Dark Walnut stain and Tung Oil
Then realize the pew needs to be refinished also, and...you got it...sand, stain, Tung Oil

Step 6...paint the base white with Annie Sloan Chalk Paint....1 coat coverage, no priming necessary...
 ...and realize the awful red stain is bleeding through
 Step 7...write nasty/constructive criticism email to Annie Sloan Paints noting that 1 coat didn't cover and priming was indeed necessary

Step 8...go back to the basics and apply 2 coats of primer...this stuff covers everything!!

Step 9...apply 2 coats of Annie Sloan Chalk Paint...again...

Step 10....distress the finish by sanding in areas that would naturally show wear

Step 11...wax on, wax off, attach hardware...step back and admire

Step 12...pour large, well deserved glass of red and relax at the table

It was a very long and drawn out process...especially waiting 2 weeks for the paint to arrive only to realize that it didn't even do what it was supposed to.  The company did respond and told me that sometimes older woods will bleed/leach through.  Needless to say it was disappointing and frustrating to go from a 1 coat no priming project to a 5 coat with priming project.   Although I must say the added layers of paint do add to the vintage look of the table.  It was a little too perfect and smooth with just the 1 coat, so that's the silver lining in this scenerio.
But I am sorry to say Annie...I'm over you....

Sunday, March 4, 2012

Double Trouble

So my 13 year old has been asking for a while now if he could switch to a larger bed.  His twin is pretty cramped so we decided to move him up to double size.  I found a great duvet cover at Ikea and knew I wanted to make the headboard and footboard out of doors so I set out to make it.  I chose 2 doors that were similar in design for the headboard and footboard.  These are 2 less doors I now have to store in our basement so everyone is happy about that!!!

Making a bed out of door is really easy because the doors are already made...so the headboard and footboard are pretty much built.  I took a trip to see my friends in the orange aprons (aka The Home Depot) and picked up new wood needed for the side rails, supports etc.
 An afternoon well wasted, I came back with the wood and screws needed for the project.

To make the bed frame work you basically measure the mattress and build a frame around that.  The side rails have supports along them to hold up the platform that the mattress rests on ( I used 1/2" MDF in this case) and I added extra supports across the width to brace it.

I wanted the headboard to be higher than the door's natural height (or width in this case since it is now on its side) so I added "legs" to it to bring the height up to about 50"....the ceiling in my son's room is sloped since it is on the 3rd floor so I wanted to make sure it would fit on that wall.  I also added a top rail to the headboard to make it look more finished.


Here's how the footboard looks after I sanded the rough and chipping paint off...I added "feet" to make it stand off the ground a few inches.


I had some left over chalk paint in Graphite from Annie Sloan....www.anniesloan.com so I put 2 coats of that on the side rails, headboard and footboard....then 2 coats of wax...wax on...wax off....

The great thing about using doors in these situations is that you get a very custom and quality look from something that is already built!!  All the detail is there you just need to cut it down to size and add some small details to make it look custom.

I found the bed hardware to put it all together at Lee Valley Tools www.leevalley.com This place is a great resource to find specialty and reproduction hardware....check here first because they have so much in their inventory.  The items I wanted were in stock so I went downtown to pick them up.

I measured the height I wanted the mattress to be from the floor and installed the hardware...no pictures here...I was busy exclaiming about how fun bed hardware is...in case you couldn't guess, that was a joke...bed hardware is NOT FUN...

It finally came together and then I carried all the pieces up to the 3rd floor...from the basement workshop...on a Sunday...needless to say I was already dreaming of a bottle of red!!

Once the hardware is installed, it goes together really easy and then can disassemble just as easily to move it.

Here is how the bed looks in Cam's room...he loves it and so do I...the perfect teen look!!

 Cam added his skimboards to the wall for some personality....love this beachy look

I love this colour on the bed frame and can't believe how well it goes with the Ikea bedding!!

Project done...check!! and now on to the powder room vanity...and the final coat to the banquette table ....that is a saga that will be another post...it was the table that almost broke me, but I managed to make it work.  Pics and details to follow on that one!

I almost forgot....I had earlier blogged about the faux Restoration Hardware light fixture I found for $2100 LESS than the original online version....I have been asked to post pics of my Homesense version so here it is.....just for you Jan!!
Here is the Restoration Hardware one for $2300 online...

 And here is ours from Homesense for $179....would you pay $2100 more for the original?? Apparently it's made from authentic wine barrels, but all I can think of is how many bottles of red I could purchase for that $2100 savings!!!

Friday, March 2, 2012

Let there be Light...

You may have heard we are thinking of a kitchen reno...so I am completely obsessed with white kitchens and everything kitchen-y these days...and by obsessed I mean I am driving my husband crazy with my constant banter about it.  He's trying to stay interested but I've noticed his eyes glazing over quite often lately...what do you mean you don't want to talk light fixtures at 8am before work???

As in everything I do, I am trying to get the look I want for less.  We are going with white Ikea cabinets, wood countertops and wood floors.  I want it to be sleek and clean but will add lots of warmth through the wood and some great vintage pieces for interest.  I am going to be making the kitchen island out of old doors and hoping to get some old stair treads to use as the top for that too....that's a whole other post though and will happen in a month or so.

My latest sourcing is lighting.  We can't really put in potlights without ripping apart the ceiling, so I want a fixture to give off light from all over as well as shine down on the island.

I found this light from Restoration Hardware...which I love, but wanted to see if I could get something similar but vintage for more character.

I have been on several vintage/reclaimed materials websites looking for these.
Here are a few jems I came across...
www.timelessmaterials.com
www.artefacts.ca
www.legacyvintage.com
www.lucanarchitectural.ca

These places are amazing sources for old reclaimed materials and have some really great finds.  All are about 1-2 hours out of the city so I find you get better material and not at city prices....worth the drive!

In my search, I found lights like this at http://www.victorian-revival.com/

 
 I want to take 2 or 3 of these and get them made into a fixture like this....
.....but for less than the $1000 I was quoted if possible


Of course I called my guy Ed and have him on the case searching for these lights as well....we will see what he comes up with.

I also want some light around the new banquette area...still waiting on my chalk paint to arrive to finish the table...and decided sconces were the only option due to our high sloping ceiling there.

I ordered some online from Home Depot that I liked....

I really liked the textured glass and the details and they were a steal at only $50 each!!
Of course then I found these babies at Victorian Revival...
And it was love at first sight...so I have some returning to do...These guys were $85 each but still a bargain and more in keeping with the industrial look I want for the kitchen.

Lighting is a crucial element in any room but especially in the kitchen where so much work is done and we spend so much of our time.

I will keep you posted on how my island fixture turns out...and also how the sconces look in their new home once my electrician (read husband!!) installs them.

Wednesday, February 22, 2012

When is it okay to fake it?

Today I went to Homesense to return some props we didn't use on a shoot.....it's one of my happy places!! 
This trip lead me to thinking about when it's okay to use a fake or copied item and when you need to go for the real deal.

While I was there, I picked up a chandelier for our living room.  My friend Tammy (who is amazing, talented and super helpful at sourcing bargains) told me about this fixture.  It is a copy of one from Restoration Hardware...also a favourite shop.

Our old fixture in the living room is original to the house which is great, but it flickers and doesn't really light all that well....the wiring is old and it's not reliable.

The decision to replace it wasn't easy since I really liked the old fixture.  I know we could re-wire it but when I saw this other one...well, I was sold.  I knew it would freshen up the room and add some character as well.

Here is the Restoration Hardware fixture....

The cost of their version is $2595 US plus delivery....the delivery charge is something that really bugs me with Restoration Hardware since they have stores here...why can't they order it in for me and I pick up from the store instead of paying $80 to have it delivered??  At least give me an option to save that delivery fee please.

The one I picked up was only $179!!!  I think that at a difference of over $2000, it would have to give off light so amazing that I looked 20 years younger and 20 lbs thinner....and even then I don't think I could spend that much.

So, in this case, the decision is to go with the fake...it is a great option that gives you the look for less.

The other item I picked up while at Homesense is cookie mix...I know, right?  Kind of a crazy combination of items to buy in one place!!

This cookie mix sounded great...healthy, yummy and easy to make.  I have purchased things from this company before and they were good quality so I trusted them.
Excited to make these for my kids after school I preheated the oven and got ready.  All I had to add was a bit of butter (I used coconut oil instead) and an egg...perfectly simple. My youngest son Luke and I added the ingredients and started mixing.  Whenever we make cookies we always try the dough before we bake them.  Luke says it's "just in case" so that we don't "poison" anyone with our baking...I say it's because he has a sweet tooth like his mom.  So spoons at the ready we tasted the dough...it was pretty dry and crumbly....and it was pretty horrible.  Tasted a little like sweetened cardboard!!  I made the executive decision to add some more butter to make them a bit richer....mixed again, tasted again...still awful.  I decided to throw in some peanut butter...to give more moisture and some flavour.  We put them on the cookie tray and baked them up.

The end result wasn't too bad, but a pretty poor substitute for the gooey and delicious chocolate chip cookies I usually make.

The verdict here is that the "fake" cookies that are trying to be healthier just don't cut it.  Sorry Bob, but your cookies don't make the grade.


Tuesday, February 21, 2012

Progress Report

Well, this banquette/dining area is taking quite a bit longer than I expected but I have to say I am please with the results so far.

If you remember from my last post...I wasn't really happy with how the table turned out once I sanded it down and finished it....

It turned out just too red in colour and too "finished" looking for my liking.  I wrestled with the decision to re-do it and I am really glad I did.

I took this piece I had made for our dog's bowls (out of a table at the curbside) as inspiration.
It has the more rustic look I was going for on the pew and the table. 

So back to the workshop I headed.  I wanted to make the table top darker and decided to paint the base white (one order of Annie Sloan Chalk Paint is on it's way to me as I write this).  So I sanded the table...again....to take off the oil finish and then added a coat of Dark Walnut Stain.  Then I re-oiled the top....I left the base as it was since I was painting it anyway.

Of course once I did that I took a look at the pew and wasn't happy with it...it's sort of an annoying habit I have.

I really have an aversion to orangey/red coloured woods...like really really have an aversion.  The pew was in it's original state and I was hesitant to mess with it.  But my theory is, if you don't really love something why have it in your house?  Don't we already have spaces that are too small, lives too busy and funds too short to put up with things we don't like just for sake of tradition.

Soo....my little pew underwent a mini makeover.  However halfway through my sanding...yes again sanding...I honestly was doubting the wisdom of this idea.  At least this time I decided to move outdoors to do all the work so the house wasn't covered in dust again.

Here are the results so far.....

Now all that is left to do is paint the base of the table (I am going to cover everything but the very top oval) in white, distress that paint a bit, wax that paint finish and re-cover the two chairs in a fabulous-yet-to-be-found-fabric.....sounds easy right?

I'd love to hear you weigh in on whether I should paint this table though...I have been flip flopping on whether to paint the base white, or just stain the whole thing dark like the top.  My gut says paint since we are redoing the floors in hardwood and I think it might just be too woody for my liking...thoughts?

This is what I am picturing it to look like ....


I plan to finish this project just as soon as my paint arrives....so hopefully that little brown UPS truck comes rolling up my street real soon...